|
|
|
![]()
ShadowLight Inc's Web Page Control Panel
|
Example Use of FractalGen's Output Images
All images and sample screens (c) ShadowLight, Inc. 2002
We will demonstrate how to use FractalGen's Output Images in a 3D Program (LightWave 3D in this case)
- Based on the three sample maps shown on FractalGen's Homepage, we can generate a 3D landscape quite easily.
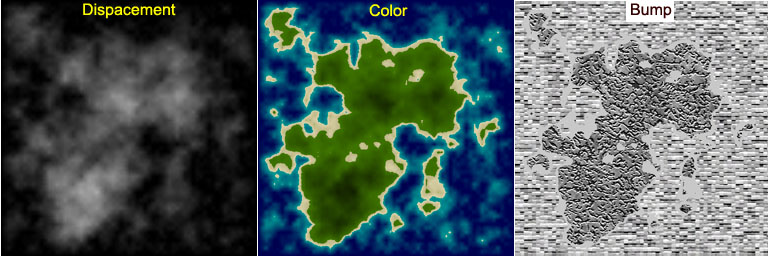
- The three images used are:
- Displacement - grayscale image to displace the landscape grid object
- Color - Add to the color channel to color the landscape
- Bump - Add to the bump channel to add bumps along the surface.
Three example maps are shown here side by side (shown side by side & reduced 1/2 size):
In the example that follows, the descriptions, images and terminology are relative to LightWave 3D's interface. Your setup may be different for your software but should be similar.
- For this example, a 500 m X 500 m mesh plane with 250 divisions in X & Y directions was created in Modeler. The polygons were tripled and aligned then saved as landscape.lwo
- Load your 3D program
- Load your landscape object
- Load the first map (displacement)
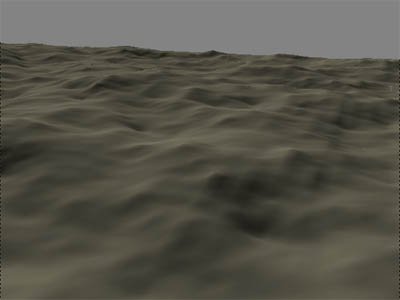
- Apply the displacement map to the object mesh at 500 x 500 m scale (Y axis) with the displacement value set to 60 m
- Place your camera location and rotation to an interesting view.
- With surface smoothing ON, we get the following OpenGL solid preview:
OpenGL with: Solid Color
Smoothing ON
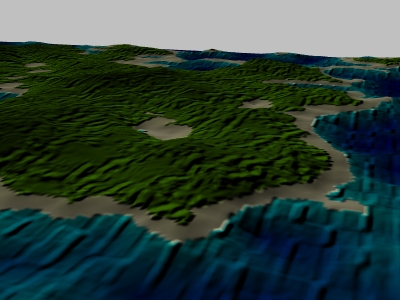
- Next, load the color map
- Apply the color map into the objects surface color channel at 500 x 500 m scale (Y axis)
- Now, the OpenGL preview (with textures ON) will give us:
OpenGL with: OpenGL Textures ON
Well, you can now see where we are headed with this process!
- Next, load the bump map
- Apply the bump map into the objects surface bump channel at 500 x 500 m scale (Y axis)
- Set bump value to 100% or greater (this can be experimented with on your own to get the desired effect)
- To see the bumps, we have to render the image, so rendering with the default settings:
Bumps Added RENDERED with:
Shadows = OFF
Reflection = OFF
Refraction = OFF
- Now, let's add some water at the beach level and render again, still just default rendering settings at this point:
Water Object Added RENDERED with:
Shadows = OFF
Reflection = OFF
Refraction = OFF
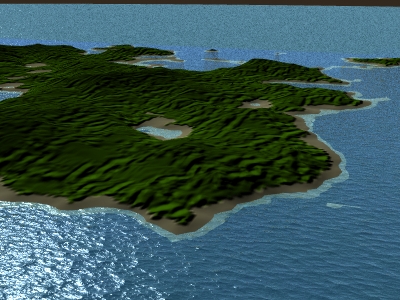
- Now, turn on a gradient backdrop, add some bumps to the water and render again:
Add Gradient Backdrop Add Bumps to water
RENDERED with:
Shadows = ON
Reflection = ON
Refraction = OFF
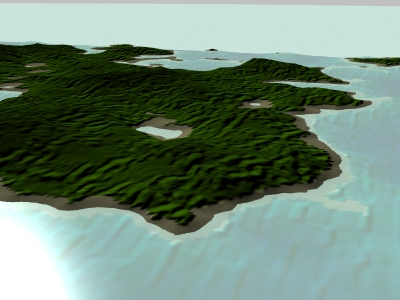
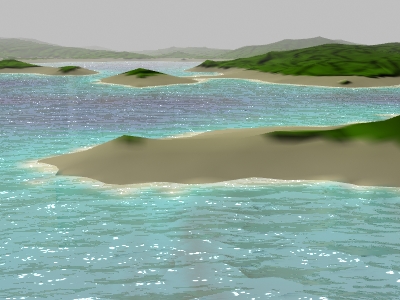
- Now, lower the camera closer to the water and change the view position, turn ON fog, turn ON refraction; render again:
Turn Fog ON Lower & change camera position
RENDERED with:
Shadows = ON
Reflection = ON
Refraction = ON
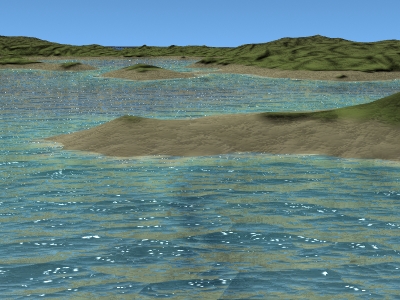
Turn Fog OFF Add more bumbs to the land
RENDERED with:
Shadows = ON
Reflection = ON
Refraction = ON
In the last two images, notice the dark blue in the water between the islands. This is a result of the combination of
- underwater color mapping
- transparency of the water object
- rendered refraction
Looks nice!
This concludes a basic idea of using FractalGen's output maps.
You can experiment as much as you desire with different camera angle or flyover animations. The possibilities are endless!
Some suggestions for experimentation:
- Set the color image map to 70% opacity and add many other color layers (fractal color noise for example)
- Add many layers of bump mapping to the landscape object.
- Animate the land growing from 0 m to 100 m. This looks similar to the "Genesis Torpedo" effect in "Star Trek II"
- If using refraction, experiment with different values for transparancy & reflection for the water.
- Put the camera under water and use some bluish green fog. Add a fish or two!
- Add buildings or other objects to the scene (lighthouse, pier, boats....)
[end]